- install
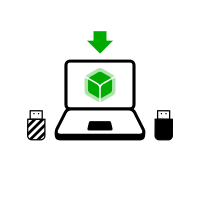
- Installa Tails da Debian o Ubuntu usando la riga di comando e GnuPG
Ti servono
1 chiavetta USB
Solo per Tails!
da almeno 8 GB
Il tuo Tails
1 chiavetta USB
Tutti i dati andranno persi!
da almeno 8 GB
Windows 7
o successivi
macOS 10.10
Yosemite
o successivi
Linux
qualsiasi distribuzione
Debian
Ubuntu
o altra derivata
Un altro Tails
chiavetta USB o su un DVD
Processore Intel
non Apple M1 or M2
Smartphone
o stampante
per seguire le istruzioni
1 ora in tutto
½ mezz'ora
¼ un quarto d’ora
1.4 GB per scaricare
½ mezz'ora per installare
½ mezz'ora per aggiornare
Requisiti di sistema dettagliati e hardware consigliato.
Sommario
Tails funziona su:
- Sulla maggior parte dei PC che abbiano meno di 10 anni
- Su alcuni vecchi computer Mac con processore Intel
Tails non funziona su:
- Sui computer Mac più recenti con processore Apple (M1 o M2)
- Smartphone o tablet
- Raspberry Pi
Tails potrebbe non funzionare su:
Alcuni computer più vecchi, ad esempio, se non hanno 2 GB di RAM.
Alcuni computer più recenti, ad esempio, se la scheda grafica non è compatibile con Linux. Le schede Nvidia or AMD Radeon spesso non funzionano in Tails.
Vedi il nostro elenco di problemi noti di compatibilità hardware.
Requisiti hardware dettagliati
Una chiavetta USB da almeno 8 GB o un DVD riscrivibile.
Tutti i dati contenuti nella chiavetta USB o nel DVD vengono persi durante l'installazione di Tails.
La capacità di avviare da chiavetta USB o da lettore DVD.
A 64-bit x86-64 IBM PC compatible processor.
2 GB di RAM per lavorare comodamente.
Tails può funzionare con meno di 2 GB di RAM, ma potrebbe presentare anomalie o andare in crash.
Hardware consigliato
I modelli di computer portatili si evolvono troppo rapidamente per poter fornire un elenco aggiornato dell'hardware consigliato. Di seguito sono riportate alcune linee guida se tu, o la tua organizzazione, state pensando di acquistare un computer portatile dedicato all'esecuzione di Tails.
Per PC
Evitare i modelli "gaming" con schede grafiche Nvidia o AMD Radeon.
Considera l'acquisto di un computer portatile ricondizionato di una serie di fascia alta (professionale). Sono più economici e durano più a lungo dei portatili nuovi ma di qualità inferiore.
Ad esempio, la serie ThinkPad di Lenovo funziona bene con Tails, compresi i modelli X250, X1 Carbon, T440, T480 e T490.
Se vivi in una parte del mondo in cui l'acquisto di computer portatili ricondizionati è poco comune, cerca su eBay e Amazon. Amazon offre una garanzia di 90 giorni [Amazon Renewed Guarantee] (https://www.amazon.com/gp/help/customer/display.html?nodeId=G4ZAA22U35N373NX).
Considera l'acquisto di un nuovo portatile da fornitori che garantiscono la compatibilità con Linux e Tails come ThinkPenguin.
Per Mac
Purtroppo non conosciamo alcun modello di Mac che funzioni bene con Tails e che possa eseguire l'ultima versione di macOS.
I passaggi che seguirai
Scarica Tails
Scarica Tails
Scarica l'aggiornamento
Verifica il download

Verifica il download

Verifica il download

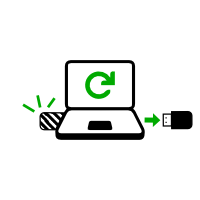
Riavvia con l'altro Tails

Scarica balenaEtcher
Installa balenaEtcher
Scarica balenaEtcher
Installa balenaEtcher
Installa Tails usando balenaEtcher
Installa Tails usando GNOME Disks
Installa Tails usando dd
Installazione intermedia usando balenaEtcher
[
Installazione intermedia usando GNOME Disks
Installazione intermedia usando GNOME Disks

Riavvia Tails sulla tua chiavetta USB
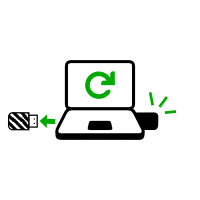
Riavvia dall'intermedio
Riavvia dall'intermedio
Installa Tails per clonazione
Aggiorna Tails per clonazione
Riavvia sul tuo nuovo Tails

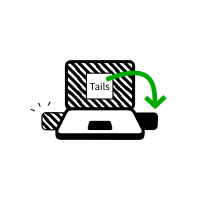
Tails ti accoglie!
Avvertenze: Tails è sicuro ma non è magico!
Tails è più sicuro di qualsiasi sistema operativo standard. Ma Tails, o qualsiasi software o sistema operativo, non può proteggerti da tutto—anche se sembra che lo faccia.
Le raccomandazioni che seguono ti terranno ancora più al sicuro, specialmente se sei ad alto rischio.
Proteggere la tua identità quando usi Tails

Tails è progettato per nascondere la tua identità.
Ma alcune delle tue attività potrebbero rivelare la tua identità:
- Condividendo file con metadati, come data, ora, posizione e informazioni sul dispositivo
- Usando Tails per più di uno scopo alla volta
Limiti della rete Tor

Tails usa la rete Tor perché è la rete più sicura e popolare per proteggerti dalla sorveglianza e dalla censura.
Ma Tor ha dei limiti se ti preoccupi di:
- Nascondere che stai usando Tor e Tails
- Proteggere le tue comunicazioni online da aggressori determinati ed esperti
Riduzione dei rischi durante l'utilizzo di computer non fidati

Tails può funzionare in sicurezza su un computer con un virus.
Ma Tails non può sempre proteggerti quando:
- Viene installato da un computer infetto
- Tail viene eseguito su un computer con BIOS, firmware o hardware compromessi


Poiché devi sempre adattare le tue pratiche di sicurezza digitale alle tue specfiche esigenze e minacce, ti esortiamo a saperne di più leggendo le seguenti guide:
Verifica la chiave di firma di Tails
Se hai già verificato la chiave di firma di Tails con la tua chiave, puoi saltare questo passaggio e iniziare a scaricare e verificare l'immagine USB.
In questo passaggio, scaricherai e verificherai la chiave di firma di Tails che è la chiave OpenPGP usata per firmare crittograficamente l'immagine USB di Tails.
Per seguire queste istruzioni è necessario che tu abbia la tua propria chiave OpenPGP.
Per imparare a crearti una chiave OpenPGP, vedi Gestire le chiavi OpenPGP di Riseup.
Questa tecnica di verifica usa il Web of Trust di OpenPGP e la certificazione fatta dagli sviluppatori ufficiali Debian riguardo la chiave di autenticazione di Tails.
Importa la chiave di autenticazione di Tails nel tuo portachiavi GnuPG:
wget https://tails.net/tails-signing.key
gpg --import < tails-signing.key
Installa il portachiavi di Debian. Contiene le chiavi OpenPGP di tutti gli sviluppatori Debian:
sudo apt update && sudo apt install debian-keyring
Importa la chiave OpenPGP di Chris Lamb, un ex leader del progetto Debian, dal portachiavi Debian al tuo portachiavi:
gpg --keyring=/usr/share/keyrings/debian-keyring.gpg --export chris@chris-lamb.co.uk | gpg --import
Verifica le certificazioni riguardo la chiave di firma di Tails:
gpg --keyid-format 0xlong --check-sigs A490D0F4D311A4153E2BB7CADBB802B258ACD84F
Nel risultato di questo comando, cerca la seguente linea:
sig!2 0x1E953E27D4311E58 2020-03-19 Chris Lamb <chris@chris-lamb.co.uk>Qui,
sig!2significa che Chris Lamb ha verificato e certificato la chiave di firma di Tails con la sua chiave.È possibile verificare le certificazioni fatte da altre persone. Il loro nome e indirizzo email figurano nella lista di certificazione se hai la loro chiave nl tuo portachiavi.
Se la verifica del certificato non è riuscita, potresti aver scaricato una versione malevole della chiave cifrata di Tails o le nostre istruzioni potrebbero essere obsolete. Per favore mettiti in contatto con noi.
La linea
175 firme non controllate a causa di chiavi mancantio simile si riferisce alle certificazioni (chiamate anche firme) fatte da altre chiavi pubbliche che non si trovano nel portachiavi. Questo non è un problema.Certifica la chiave di Tails con la tua chiave:
gpg --lsign-key A490D0F4D311A4153E2BB7CADBB802B258ACD84F
Scarica Tails
Scarica l'immagine USB:
wget --continue https://download.tails.net/tails/stable/tails-amd64-6.5/tails-amd64-6.5.img
Verifica il download
In questo passaggio, verificherai il tuo download utilizzando la chiave di Tails.
Scaricare la firma dell'immagine USB:
wget https://tails.net/torrents/files/tails-amd64-6.5.img.sig
Verificare che l'immagine USB sia firmata dalla chiave di Tails:
TZ=UTC gpg --no-options --keyid-format long --verify tails-amd64-6.5.img.sig tails-amd64-6.5.img
L'output di questo comando dovrebbe essere il seguente:
gpg: Signature made Mon Jul 15 15:41:00 2024 UTC
gpg: using EDDSA key ADA2EDA956C296A70A6D7FF4FE2C600D5BB759B5
gpg: Good signature from "Tails developers (offline long-term identity key) <tails@boum.org>" [full]
gpg: aka "Tails developers <tails@boum.org>" [full]
Verificare in questo output che:
La data della firma corrisponde.
La firma è contrassegnata come
Buona firma, poiché la chiave di firma di Tails è stata certificata con la tua chiave.
Installa Tails usando dd
Assicurati che la chiavetta USB su cui vuoi installare Tails sia scollegata.
-
Esegui il comando seguente:
ls -1 /dev/sd?
Restituisce un elenco dei dispositivi di archiviazione sul sistema. Ad esempio:
dev/sda Inserisci la chiavetta USB in cui desideri installare Tails.
Tutti i dati su questa chiavetta USB andranno persi.
Esegui nuovamente lo stesso comando:
ls -1 /dev/sd?
La tua chiavetta USB appare come un nuovo dispositivo nell'elenco.
/dev/sda
    /dev/sdb
Prendi nota del nome del dispositivo della tua chiavetta USB.
In questo esempio, il nome del dispositivo della chiavetta USB è
/dev/sdb. Il tuo potrebbe essere diverso.Se non sei sicura del nome del dispositivo, dovresti interrompere la procedura o rischi di sovrascrivere qualsiasi disco fisso del sistema.
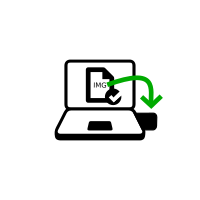
Esegui i seguenti comandi per copiare l'immagine USB che hai scaricato in precedenza sulla chiavetta USB.
Sostituisci:
tails.img con il percorso dell'immagine USB
dispositivo con il nome del dispositivo trovato nel passaggio 5
dd if=tails.img of=dispositivo bs=16M oflag=direct status=progress
Dovresti ottenere qualcosa del genere:
dd if=/home/user/tails-amd64-3.12.img of=/dev/sdb bs=16M oflag=direct status=progress
Se non viene restituito alcun messaggio di errore, Tails viene copiato sulla chiavetta USB. La copia richiede un po' di tempo, generalmente qualche minuto.
Se hai un errore
Permesso negato, prova ad aggiungeresudoat the beginning of the command:sudo dd if=tails.img of=dispositivo bs=16M oflag=direct status=progress
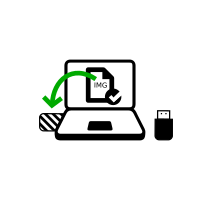
L'installazione è completa dopo la ricomparsa del prompt dei comandi.
Ben fatto!
Complimenti, hai installato Tails sulla tua chiavetta USB!
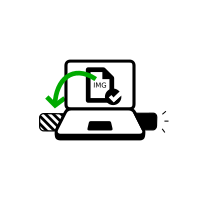
Riavvia il computer sulla prima chiave USB.
Tails potrebbe non funzionare sul tuo computer, quindi buona fortuna!
Se hai già iniziato con l'altro Tails, passa direttamente al punto 3:Verifica che l'altro Tails sia aggiornato.
Apri queste istruzioni su un altro dispositivo
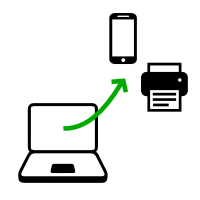
Nella fase successiva, spegnerai il computer. Per poter seguire il resto delle istruzioni in seguito, puoi scegliere tra:
Scansiona questo codice QR sul tuo smartphone o tablet:
tails net install win dows back 1.png


 tails net install mac clone back 1.png


Stampa le istruzioni su carta.
Prendi nota dell'URL di questa pagina:
https://tails.net/install/windows?back=1
https://tails.net/install/mac?back=1
https://tails.net/install/linux?back=1
https://tails.net/install/expert?back=1
https://tails.net/install/clone/pc?back=1
https://tails.net/install/clone/mac?back=1
https://tails.net/upgrade/tails?back=1
https://tails.net/upgrade/windows?back=1
https://tails.net/upgrade/mac?back=1
https://tails.net/upgrade/linux?back=1
https://tails.net/upgrade/clone?back=1
Riavvia sulla Tails intermediaria
Riavvia su un altra Tails
Riavvia sulla tua chiavetta USB Tails

Riavvia il computer dalla chiave USB.
-
Assicurati di aver installato Tails usando o:
Clicca il tasto Avvia
 .
.Tieni premuto il tasto Shift mentre selezioni Power ▸ Riavvia.
Nella schermata Scegli un'opzione, seleziona Utilizza un dispositivo.
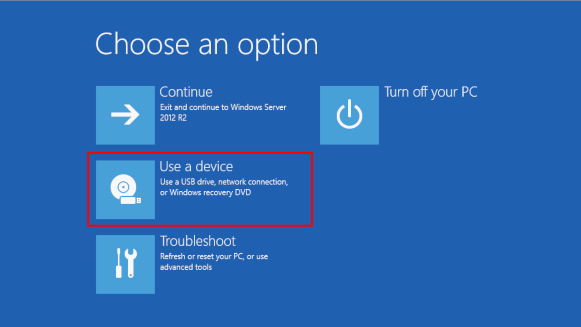
Se la schermata Scegli un'opzione o l'opzione utilizza un dispositivo non appare, fai riferimento alle istruzioni per avviare Tails utilizzando il tasto del Menù di Avvio.
Nella schermata Usa un dispositivo, scegli Menu di avvio.
Windows si spegne, il computer si riavvia e appare un menu di avvio.
Inserisci la tua chiavetta USB Tails poco dopo aver scelto il Menù di avvio e mentre Windows si sta spegnendo.
If your Windows has no Boot Menu option available, make sure that your Tails USB stick is plugged in and choose your USB stick directly in the list of devices.
In futuro, noi noi raccomandiamo di inserire la tua chiavetta USB Tails solo mentre Windows è spento. Altrimenti, un virus in Windows potrebbe infettare la tua chiavetta USB Tails e rompere la sua sicurezza.
Un attacco di questo tipo è possibile in teoria, ma molto improbabile in pratica. Non conosciamo alcun virus in grado di infettare Tails. Vedi le nostre avvertenze sull'utilizzo di Tails in sistemi non affidabili
Il Boot Menu è una lista di possibili dispositivi da cui partire. La seguente schermata è un esempio di un menu di avvio:
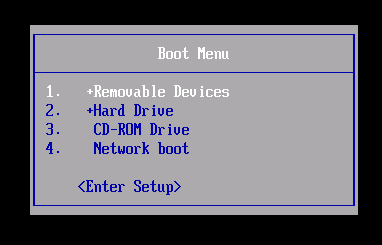
Nel menu di avvio, seleziona la tua chiavetta USB e premi Invio.
Se il computer si avvia con Tails, appare il Boot Loader e Tails si avvia automaticamente dopo 4 secondi.
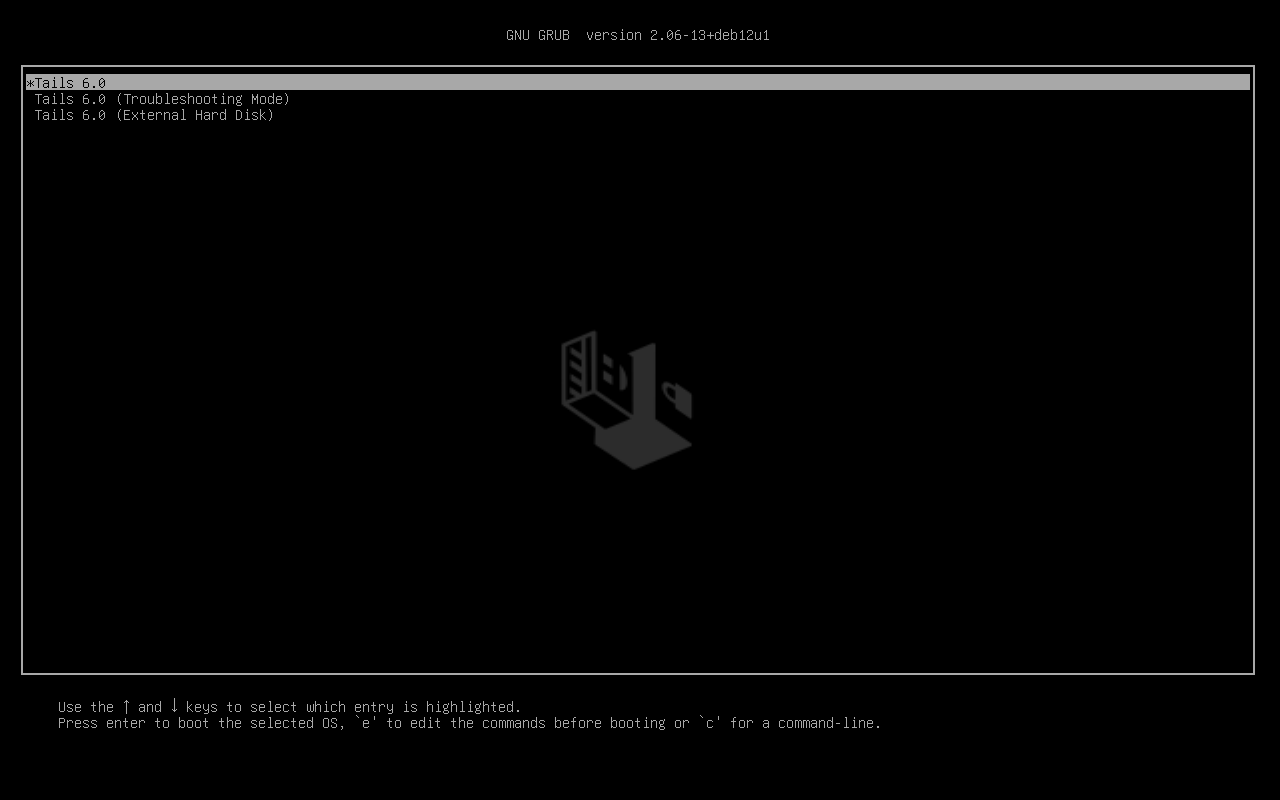
La voce Troubleshooting Mode disabilita alcune funzionalità del kernel Linux e potrebbe funzionare meglio su alcuni computer. Puoi provare questa opzione se ritieni che si verifichino errori di compatibilità hardware durante l'avvio di Tails.
La voce Disco Rigido Esterno permette di avviare da un disco rigido esterno e alcune chiavette USB problematiche.
La maggior parte dei computer non si avvia automaticamente dalla chiavetta USB Tails, ma puoi premere un tasto del Boot Menu per visualizzare una lista di possibili dispositivi da cui partire.
Se Windows 8 o 10 è anche installato sul computer, puoi invece fare riferimento alle istruzioni su come avviare Tails da Windows 8 o 10. Avviare Tails da Windows è più semplice che usare il tasto Boot Menu.
La seguente schermata è un esempio di un menu di avvio:
Questa animazione riassume come usare il tasto Boot Menu per avviare la chiavetta USB:
Le seguenti istruzioni spiegano in dettaglio come usare il tasto Boot Menu per avviare la chiavetta USB:
-
Assicurati di aver installato Tails usando o:
-
Spegni il computer lasciando inserita la chiavetta USB.
Spegni il computer e inserisci la chiavetta USB di Tails.
Spegni il computer.
Inserisci l'altra chiavetta USB Tails da cui vuoi eseguire installazione aggiornamento.
Disinserisci la tua chiavetta USB Tails lasciando inserita la chiavetta USB intermedia.
-
Identifica nella seguente lista i possibili tasti del menu di avvio del computer a seconda del produttore del computer :
Produttore Tasto Acer F12, F9, F2, Esc Apple Opzione Asus Esc Clevo F7 Dell F12 Fujitsu F12, Esc HP F9 Huawei F12 Intel F10 Lenovo F12, Novo MSI F11 Samsung Esc, F12, F2 Sony F11, Esc, F10 Toshiba F12 Others… F12, Esc Su molti computer, all'accensione viene visualizzato molto brevemente un messaggio che spiega anche come aprire il menu di avvio o modificare le impostazioni del BIOS.
-
Riaccendi il computer.
Premi immediatamente più volte il tasto del Boot Menu che hai identificato nel passo 2 .
-
Se il computer si avvia su un altro sistema operativo o restituisce un messaggio di errore, spegni nuovamente il computer e ripeti il passo 3 con tutti i possibili tasti del Boot Menu identificati nel passo 2.
Se appare un menu di avvio con una lista di dispositivi, seleziona la tua chiavetta USB e premi Invio.
Se il computer si avvia con Tails, appare il Boot Loader e Tails si avvia automaticamente dopo 4 secondi.
-
Assicurati di aver installato Tails usando o:
-
Spegni il computer.
Spegni il computer lasciando inserita la chiavetta USB.
Inserisci l'altra chiavetta USB Tails dalla quale vuoi eseguire l'installazione.
-
Inserisci la tua chiavetta USB con Tails.
-
Riaccendi il computer.
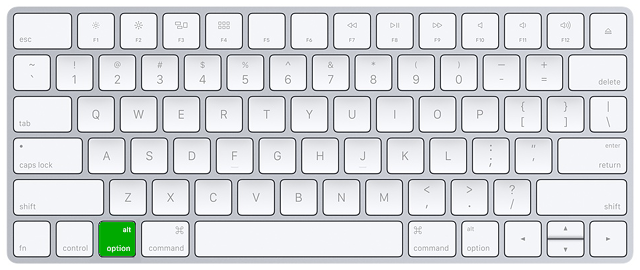
Accendi il computer e immediatamente premi e mantieni premuto il tastoOption key (⌥ o tasto Alt ) quando viene riprodotto il suono di avvio.
Tieni premuto il tasto finché non appare un elenco di possibili dischi di avvio.
-
Seleziona la chiavetta USB e premi Invio. La chiavetta USB appare come un disco rigido esterno e può avere l'etichetta EFI Boot o Windows come nella seguente immagine da schermo:
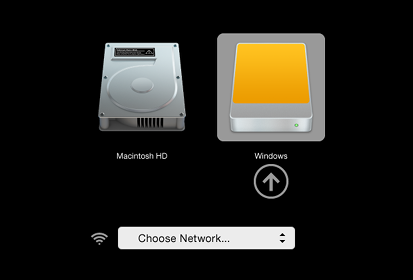
Se la chiavetta USB non compare nell'elenco dei dischi di avvio:
Wait 2–3 minutes and try again. Some USB sticks need some rest after installing.
Try all other USB ports on the computer. Some USB ports cannot be used to start from.
Make sure that you have installed Tails using either:
Make sure that you have verified your download of Tails.
Make sure that you have verified your download.
-
Try to install again on the same USB stick.
Try to install again on the same USB stick.
Try to install again on the same USB stick.
Try to install again on the same USB stick.
Try to install again on the same USB stick.
Try to install again on the same USB stick.
Try to install again on the same USB stick.
Try to install again on the same USB stick.
Try to install again on the same USB stick.
Try to install again on the same USB stick.
Try to install again on the same USB stick.
Try to install again on the same USB stick.
Try to install on a different USB stick.
Try to use the same USB stick to start on a different computer.
Se il computer non visualizza ancora il Boot Loader, potrebbe essere impossibile avviare Tails sul tuo computer.
-
Se il tuo Mac visualizza l'errore seguente:
Le impostazioni di sicurezza non consentono a questo Mac di utilizzare un disco di avvio esterno.
Quindi devi modificare le impostazioni dell'Utilità di sicurezza all'avvio del tuo Mac per autorizzare l'avvio di Tails.
Per aprire l'Utilità di sicurezza all'avvio:
Accendi il Mac, quindi tieni premuto Comando(⌘)+R subito dopo aver visto il logo Apple. Il Mac si avvia da Ripristino macOS.
Quando viene visualizzata la finestra Utilità di macOS, scegli Utility ▸ Utilità di sicurezza all'avvio dalla barra del menu.
Quando ti viene richiesto di autenticarti, clicca Inserisci password macOS, quindi scegli un account di amministratore e inserisci la relativa password.
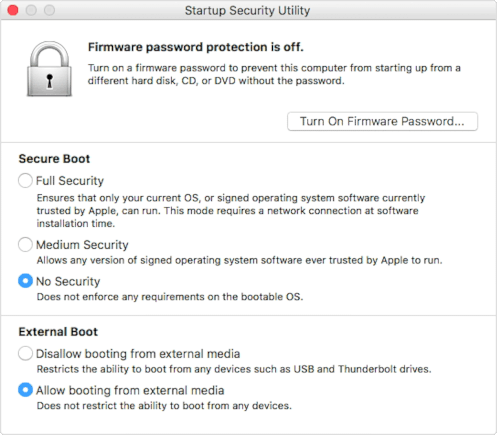
A l' Avvio dell'utilità di sicurezza:
Scegli Nessuna Sicurezza nella sezione Avvio Sicuro.
Scegli Consenti l'avvio da supporti esterni in Avvio Esterno.
Per proteggere ancora il tuo Mac dall'avvio da supporti esterni non affidabili, è possibile impostare una password del firmware, disponibile su macOS Mountain Lion o versioni successive. La password del firmware impedisce agli utenti che non ne sono in possesso di avviare il Mac da un supporto diverso dal disco di avvio designato.
Se dimentichi la password del firmware, è necessario un appuntamento di persona con un Apple Store o un fornitore di servizi autorizzato Apple.
Ulteriori informazioni su Supporto Apple:
Se il computer si avvia con Tails, appare il Boot Loader e Tails si avvia automaticamente dopo 4 secondi.
La voce Troubleshooting Mode disabilita alcune funzionalità del kernel Linux e potrebbe funzionare meglio su alcuni computer. Puoi provare questa opzione se ritieni che si verifichino errori di compatibilità hardware durante l'avvio di Tails.
La voce Disco Rigido Esterno permette di avviare da un disco rigido esterno e alcune chiavette USB problematiche.
Risoluzione dei Problemi Tails non si avvia<h2
-
Se non appare il menu di avvio, fai riferimento alle istruzioni per l'avvio di Tails con il tasto del menu di avvio.
-
Se nessuno dei possibili tasti del menu di avvio della procedura usata precedentemente funziona, fai riferimento alle istruzioni per la risoluzione dei problemi di Tails che non si avvia affatto.
-
Se viene visualizzato il menu di avvio ma la chiavetta USB non è elencata nel menu di avvio:
Aspetta 2–3 minuti e riprova. Alcune chiavette USB hanno bisogno di una pausa dopo l'installazione.
Prova tutte le altre porte USB del computer. Alcune porte USB non possono essere utilizzate per l'avvio.
-
Se la chiavetta USB è elencata nel menu di avvio ma il Boot Loader non appare:
Se la tua chiavetta USB è elencata nel menu di avvio ma il Boot Loader non appare:
Wait 2–3 minutes and try again. Some USB sticks need some rest after installing.
Try all other USB ports on the computer. Some USB ports cannot be used to start from.
Assicurati di aver installato Tails usando o:
Make sure that you have verified your download of Tails.
Make sure that you have verified your download.
-
Try to install again on the same USB stick.
Try to install again on the same USB stick.
Try to install again on the same USB stick.
Try to install again on the same USB stick.
Try to install again on the same USB stick.
Try to install again on the same USB stick.
Try to install again on the same USB stick.
Try to install again on the same USB stick.
Try to install again on the same USB stick.
Try to install again on the same USB stick.
Try to install again on the same USB stick.
Try to install again on the same USB stick.
Try to install on a different USB stick.
Try to use the same USB stick to start on a different computer.
Se il tuo computer non visualizza ancora il Boot Loader, potrebbe essere impossibile avviare Tails sul tuo computer.
-
Se appare il Boot Loader ma Tails non si avvia dopo il Boot Loader, fai riferimento a la sezione sulla risoluzione dei problemi relativi al mancato avvio di Tails dopo il Boot Loader.
L'avvio del computer tramite un tasto del menu di avvio può essere più rapido rispetto all'avvio del computer prima con Windows e poi con Tails. Ti consigliamo di imparare come avviare Tails usando il tasto del menu di avvio se usi Tails regolarmente
Per Apple non è prioritario collaborare con i progetti di Software Libero. Sul loro hardware più recente per gli sviluppatori di Software Libero è molto difficile di solito farci funzionare Linux e quindi Tails. L'hardware dei PC tende a essere più aperto e a funzionare meglio con Linux.
Buon inizio con Tails!
Avvio di Tails
Dopo il menu di avvio, viene visualizzata una schermata di caricamento.

Dopo uno o due minuti dall'avvio del Boot Loader e dalla schermata di caricamento, viene visualizzata la schermata di Buon inizio con Tails.
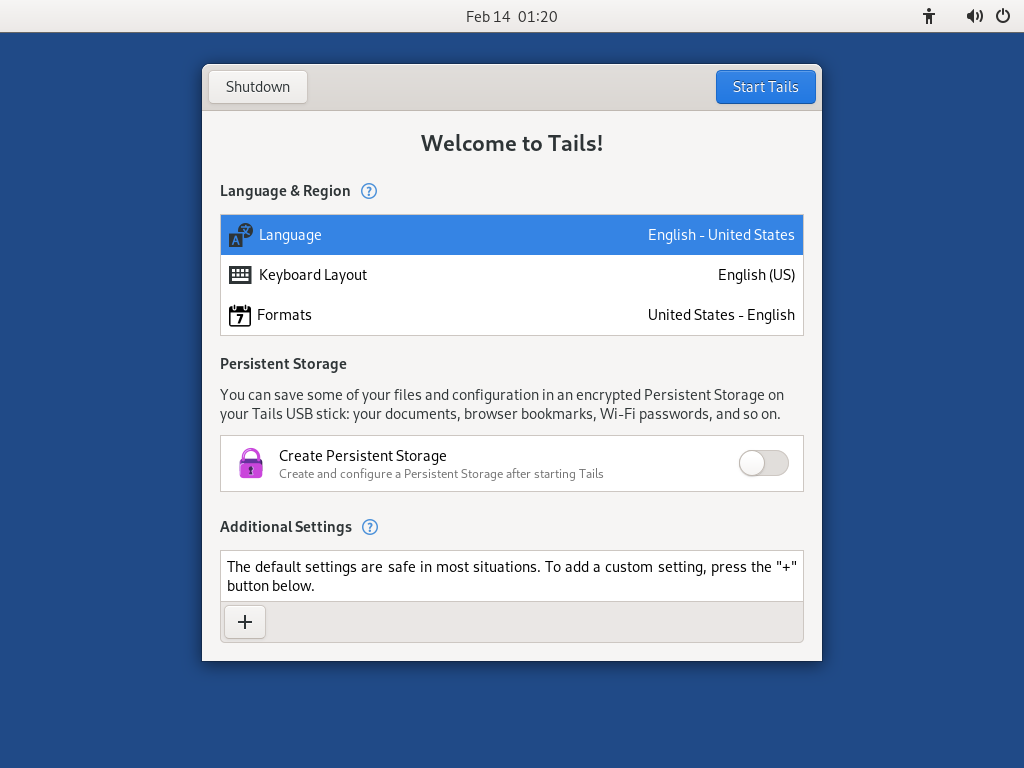
Nella schermata di benvenuto, seleziona la lingua e il layout della tastiera nella sezione Lingua e Formati . Clicca Avvia Tails.
ISe la tastiera o il touchpad non funzionano, prova a utilizzare una tastiera o un mouse USB.
Dopo 15–30 secondi, appare il desktop di Tails.

Un benvenuto al vostro nuovo Tails
Ce l'hai fatta!
Sei riuscito ad avviare il tuo nuovo Tails sul tuo computer!
Congratulazioni per mantenerti al sicuro :)
Per continuare a scoprire Tails, leggi la nostra documentation.
Verifica la tua connessione Wi-Fi
I problemi con il Wi-Fi sono purtroppo abbastanza comuni in Tails e in Linux in generale. Per verificare se la tua interfaccia Wi-Fi funziona in Tails:
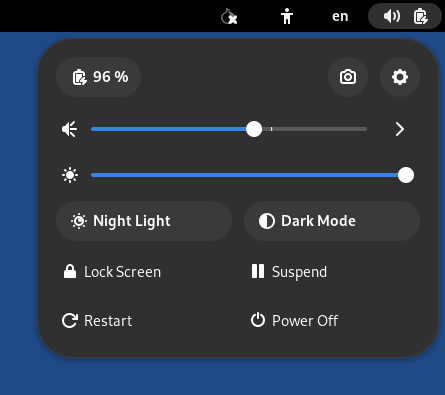
Apri il menu di sistema in alto a destra:

Scegli Wi-Fi Non Connesso e poi Seleziona Rete.
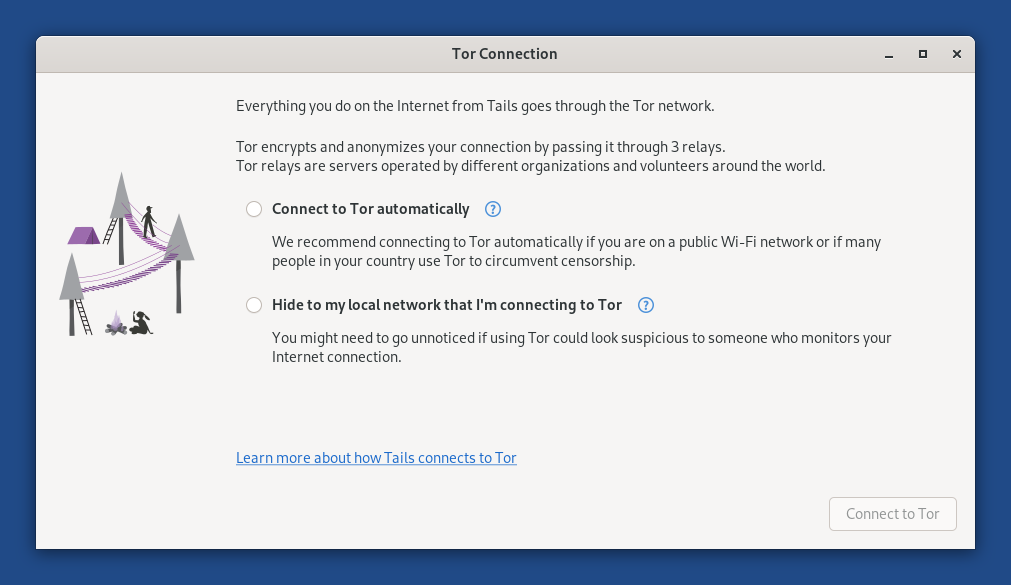
Dopo aver stabilito una connessione a una rete locale, appare l'assistente Tor Connection per aiutarti a connetterti alla rete Tor.
Se la tua interfaccia Wi-Fi non funziona, è possibile che si verifichi quanto segue:
Non c'è Wi-Fi menù nel menù di sistema:
L'interfaccia è disabilitata perché l'anonimizzazione dell'indirizzo MAC non è riuscita:

In questo caso, è possibile disattivare l'anonimizzazione dell'indirizzo MAC nella Schermata di Benvenuto. Questa operazione ha implicazioni per la sicurezza, quindi leggi attentamente la nostra documentazione sull'anonimo dell'indirizzo MAC anonymization.
Viene visualizzato il seguente avviso:
Attivazione della connessione di rete non riuscita
Per connetterti a Internet, puoi provare a:
Utilizzare un cavo Ethernet al posto del Wi-Fi se possibile. Le interfacce cablate sono molto più stabili del Wi-Fi in Tails.
Condividere il Wi-Fi o la connessione dati del tuo telefono utilizzando un cavo USB. Condividere una connessione in questo modo è definito USB tethering.

Vedi le istruzioni per:
-
Solo la condivisione dei dati funziona su iPhone e iPad; la condivisione Wi-Fi non funziona.
Tails non può nascondere le informazioni che identificano il telefono sulla rete locale. Se colleghi il tuo telefono a una rete
Wi-Fi: la rete può vedere l'indirizzo MAC del tuo telefono.
Questo ha implicazioni per la sicurezza che spieghiamo nel nostro documentation on MAC address anonymization. Alcuni telefoni dispongono di una funzione per nascondere l'indirizzo MAC del telefono.
Rete dati mobile: la rete è in grado di conoscere l'identificativo della tua carta SIM (IMSI) e il numero di serie del telefono (IMEI).
-
Comprare un adattatore USB Wi-Fi che funzioni con Tails:
Vendor Model Size Speed Price Buy offline Buy online Panda Wireless Ultra Nano 150 Mbit/s $18 No Amazon Panda Wireless PAU05 Small 300 Mbit/s $65 No Amazon ThinkPenguin TPE-N150USB Nano 150 Mbit/s $74 No ThinkPenguin Se trovi un altro adattatore Wi-Fi USB che funziona in Tails, ti preghiamo di farcelo sapere. Puoi scrivere a tails-support-private@boum.org (indirizzo email privato).
Verifica nel nostro elenco di problemi noti del Wi-Fi se esiste una soluzione per far funzionare la tua interfaccia Wi-Fi in Tails.