- upgrade
- Mise à jour manuelle depuis Linux
Vous avez besoin de
1 clé USB
Seulement pour Tails !
d'au moins 8 Go
Votre Tails
1 clé USB
Toutes les données seront perdues !
d'au moins 8 Go
Windows 7
ou plus récent
macOS 10.10
Yosemite
ou plus récent
Linux
n'importe quelle distribution
Debian
Ubuntu
ou une autre dérivée
Un autre Tails
sur une clé USB ou un DVD
Processeur Intel
pas Apple M1 ou M2
Smartphone
ou imprimante
pour suivre les instructions
1 heure au total
½ heure
¼ heure
1.4 GB à télécharger
½ heure pour installer
½ heure pour mettre à jour
Configuration requise détaillée et matériel recommandé.
Résumé
Tails fonctionne sur :
- La plupart des ordinateurs PC qui ont moins de 10 ans
- Certains vieux ordinateurs Mac avec un processeur Intel
Tails ne fonctionne pas sur :
- Les ordinateurs Mac récents avec un processeur Apple (M1 ou M2)
- Les smartphones et les tablettes
- Raspberry Pi
Tails pourrait ne pas marcher sur :
Certains vieux ordinateurs, s'ils n'ont pas 2 Go de RAM par exemple.
Certains ordinateurs récents, par exemple, si leur carte graphique est incompatible avec Linux. Les cartes Nvidia ou AMD Radeon ne fonctionnent souvent pas dans Tails.
Voir notre liste des problèmes de compatibilité matérielle connus.
Besoins matériels détaillés
Une clé USB de 8 Go minimum ou un DVD enregistrable.
Toutes les données présentes sur la clé USB ou sur le DVD sont perdues lors de l'installation de Tails.
La possibilité de démarrer à partir d'une clé USB ou d'un lecteur de DVD.
Un processeur compatible IBM PC 64 bits x86-64.
2 Go de RAM pour une utilisation confortable.
Tails peut fonctionner avec moins de 2 Go de RAM, mais pourrait se comporter anormalement ou avoir des plantages.
Matériel recommandé
Les modèles d'ordinateurs portables évoluent trop rapidement pour nous permettre de fournir une liste à jour du matériel recommandé. Ci-dessous se trouvent quelques consignes si vous, ou votre organisation, envisagez d'acquérir un ordinateur portable dédié à faire tourner Tails.
Pour PC
Évitez les modèles dédiés au jeu vidéo ("gaming") avec des cartes graphiques Nvidia ou AMD Radeon.
Réfléchissez à acheter un ordinateur portable reconditionné de séries haut de gamme (professionnelles). Ils sont moins chers et dureront plus longtemps que des ordinateurs portables récents mais de moins bonne qualité.
Par exemple, les séries de Lenovo ThinkPad fonctionnent bien avec Tails, notamment les modèles X250, X1 Carbon, T440, T480 et T490.
Si vous vivez dans une partie du monde où acheter des ordinateurs portables reconditionnés est inhabituel, regardez sur eBay et Amazon. Amazon offre une garantie Amazon Renewed de 90 jours.
Réfléchissez à acheter un nouvel ordinateur portable chez un marchand garantissant la compatibilité avec Linux et Tails comme ThinkPenguin.
Pour Mac
Malheureusement, nous ne connaissons pas de modèle de Mac qui fonctionne bien avec Tails et qui peut faire tourner la dernière version de macOS.
Votre marche à suivre
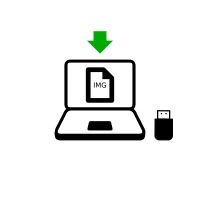
Télécharger Tails
Télécharger Tails
Télécharger la mise à jour

Vérifier votre téléchargement

Vérifier votre téléchargement

Vérifier votre téléchargement

Redémarrer sur l'autre Tails

Télécharger balenaEtcher
Installer balenaEtcher
Télécharger balenaEtcher
Installer balenaEtcher
Installer Tails à l'aide de balenaEtcher
Installer Tails à l'aide de GNOME Disks
Installer Tails à l'aide de dd
Installer l'intermédiaire à l'aide de balenaEtcher
Installer l'intermédiaire à l'aide de GNOME Disks
Installer l'intermédiaire à l'aide de GNOME Disks

Redémarrer sur votre clé USB Tails
Redémarrer sur l'intermédiaire
Redémarrer sur l'intermédiaire
Installer Tails par clonage
Mettre à jour votre Tails par clonage
Redémarrer sur votre nouveau Tails

Bienvenue dans Tails !
Télécharger Tails
ou télécharger via BitTorrent BitTorrent
Enregistrez votre téléchargement dans votre dossier Téléchargements habituel et pas sur la clé USB.
Nous vous recommandons de sauvegarder votre téléchargement dans votre stockage persistant. Sinon, Tails pourrait arrêter de répondre si la mémoire vive de l'ordinateur est pleine.
Pendant que vous téléchargez, nous vous conseillons de lire les notes de version pour Tails 6.5 . Elles documentent tous les changements dans cette nouvelle version : nouvelles fonctionnalités, problèmes qui ont été résolus et problèmes connus qui ont déjà été identifiés.
Vérifier votre téléchargement
Vérifier le téléchargement permet de s'assurer qu'il est sûr et qu'il n'a pas été corrompu au cours du téléchargement.
Votre client BitTorrent va automatiquement vérifier votre téléchargement lorsqu'il sera terminé.
La vérification ci-dessous est optionnelle pour un téléchargement par BitTorrent.
Il semble que vous ayez désactivé JavaScript. Pour vérifier votre téléchargement, vous pouvez soit :
Activer JavaScript et recharger la page.
Comparez manuellement la somme de contrôle de votre téléchargement avec celle de nos images. Dans Tails, vous pouvez installer GtkHash comme logiciel supplémentaire
Vérifier votre téléchagement à l'aide de notre clé de signature OpenPGP et signature OpenPGP signature OpenPGP.
Nous ne fournissons plus d'instructions pour vérifiez les téléchargements avec OpenPGP.
Voir notre analyse de sécurité des différentes méthodes de vérification.
Il semble que vous utilisiez Internet Explorer. Pour vérifier votre téléchargement, merci d'utiliser un navigateur différent.
ou vérifier en utilisant la signature OpenPGP
signature OpenPGP signature OpenPGP.
Si vous ne savez pas comment utiliser une signature OpenPGP, cliquer sur le bouton Sélectionner votre téléchargement… pour vérifier votre téléchargement à l'aide de JavaScript.
Analyse de sécurité des différentes méthodes de vérification
Vérification $FILENAME…
![]() Vérification
réussie ! ($FILENAME)
Vérification
réussie ! ($FILENAME)
![]() Échec de la
vérification ! ($FILENAME)
Échec de la
vérification ! ($FILENAME)
La plupart du temps, la vérification échoue parce qu'il y a eu une erreur ou une interruption pendant le téléchargement.
La vérification échoue également si vous essayez de vérifier un autre téléchargement que la dernière version :Tails 6.5 .
Plus rarement, la vérification peut échouer à cause d'un téléchargement malveillant depuis nos miroirs de téléchargement ou à cause d'une attaque réseau dans votre pays ou votre réseau local.
Télécharger à nouveau est habituellement suffisant pour résoudre ce problème. Sinon, merci d'essayer de télécharger à nouveau depuis un autre endroit ou un autre ordinateur.
![]() Erreur dans la
sélection de l'image.
Erreur dans la
sélection de l'image.
Assurez vous que vous avez bien sélectionné une image USB lisible par votre navigateur.
Assurez vous que vous avez bien sélectionné une image ISO lisible par votre navigateur.
![]() Erreur lors du
téléchargement du fichier de sommes de
contrôle depuis notre site web.
Erreur lors du
téléchargement du fichier de sommes de
contrôle depuis notre site web.
Assurez-vous que votre navigateur est connecté à Internet.
![]() Erreur lors de la
lecture de l'image $FILENAME.
Erreur lors de la
lecture de l'image $FILENAME.
Assurez-vous que le fichier $FILENAME est lisible par votre navigateur.
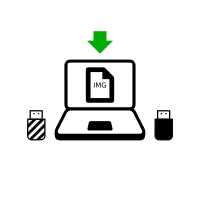
Installer un Tails intermédiaire en utilisant Disques
À cette étape, vous devrez installer un Tails intermédiaire en utilisant l'image USB Tails que vous avez téléchargé précédemment.
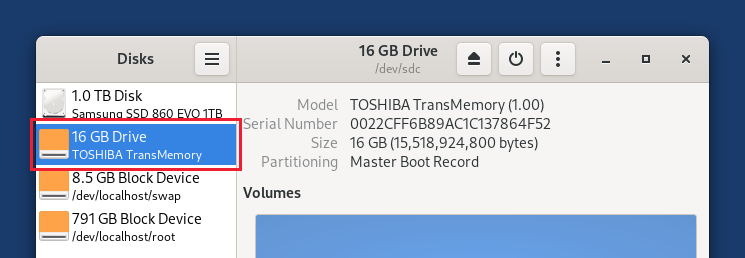
Démarrez GNOME Disques (également appelé Disques).
Par exemple, vous pouvez appuyer sur la touche Super ( ),
puis taper
),
puis taper disqueset choisir Disques.Choisissez .
Branchez la clé USB intermédiaire. sur laquelle vous voulez installer Tails.
Toutes les données sur cette clé USB seront perdues.
Le stockage persistant de votre clé USB Tails ne sera pas copié dans le Tails temporaire.
Un nouveau périphérique apparaît dans le panneau gauche. Cliquez dessus.
Cliquez sur le bouton
 dans la barre de titre et choisissez
Restaurer l'image disque.
dans la barre de titre et choisissez
Restaurer l'image disque.
Dans la fenêtre Restaurer l'image disque, cliquez sur le bouton de sélection de fichier.
Choisissez l'image USB que vous avez téléchargé précédemment.
Assurez-vous que l'image USB s'appelle tails-amd64-6.5.img et a une extension de fichier .img.
Si l'image a une extension de fichier .iso, c'est la mauvaise image. Veuillez retourner à l'étape téléchargement. l'étape téléchargement. l'étape téléchargement.
Cliquez sur le bouton Démarrer la restauration.
Dans la fenêtre de confirmation cliquez sur Restaurer.
Suivant votre distribution Linux, il peut vous être demandé votre mot de passe d'administration.
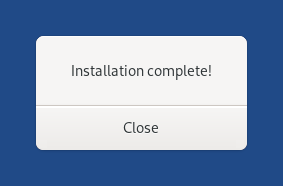
L'installation prend quelques minutes.
Une fois l'installation terminée, cliquez sur le bouton
 .
.
Bien joué !
Vous avez installé Tails sur votre clé USB.
À la prochaine étape, vous pouvez faire démarrer votre ordinateur sur cette clé USB.
Tails pourrait ne pas marcher sur votre ordinateur, alors bonne chance !
Si vous êtes déjà dans l'autre Tails, allez directement à l'étape 3 : Vérifier que l'autre Tails est à jour.
Ouvrir ces instructions sur un autre périphérique
À la prochaine étape, vous devrez éteindre l'ordinateur. Pour pouvoir suivre le reste des instructions, vous pouvez soit :
Scanner ce QR code avec votre smartphone ou votre tablette :


Imprimer ces instructions sur papier.
Noter l'adresse de cette page :
https://tails.net/install/windows?back=1
https://tails.net/install/mac?back=1
https://tails.net/install/linux?back=1
https://tails.net/install/expert?back=1
https://tails.net/install/clone/pc?back=1
https://tails.net/install/clone/mac?back=1
https://tails.net/upgrade/tails?back=1
https://tails.net/upgrade/windows?back=1
https://tails.net/upgrade/mac?back=1
https://tails.net/upgrade/linux?back=1
https://tails.net/upgrade/clone?back=1
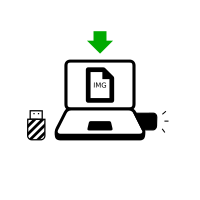
Redémarrer sur le Tails intermédiaire
Redémarrer sur l'autre Tails
Redémarrer sur votre clé USB Tails

Faire démarrer l'ordinateur sur la clé USB
-
S'assurer d'avoir installé Tails à l'aide de l'une des méthodes suivantes :
Cliquer sur le bouton Démarrer
.Appuyer et maintenir la touche Majuscule lorsque vous choisissez Alimentation ▸ Redémarrer.
Sur l'écran Choisir une option, choisir Utiliser un périphérique.
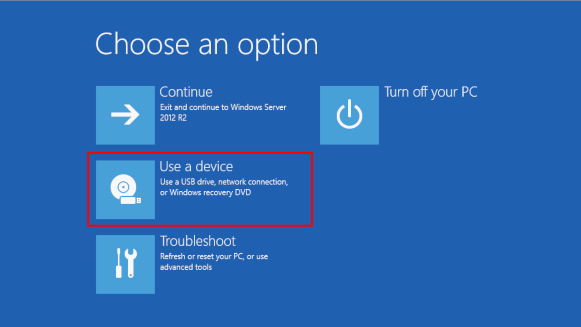
Si l'écran Choisir une option ne s'affiche pas ou si l'option Utiliser un périphérique n’apparaît pas, consultez les instructions sur le démarrage de Tails en utilisant la touche du menu de démarrage.
Sur l'écran Utiliser un périphérique, choisissez Boot Menu.
Windows s'éteint, l'ordinateur redémarre, et le menu de démarrage s'affiche.
Brancher votre clé USB Tails aussitôt après avoir choisi Menu de démarrage et pendant que Windows s'éteint.
Si votre Windows n'a pas d'option Boot Menu disponible, assurez-vous que votre clé USB Tails est branchée et choisissez votre clé USB directement dans la liste de périphériques.
À l'avenir, nous Nous recommandons de ne brancher la clé USB Tails qu'une fois que Windows est éteint. Sinon, un virus dans Windows pourrait infecter votre clé USB Tails et compromettre sa sécurité.
Une telle attaque est théoriquement possible, mais très peu probable en pratique. Nous ne connaissons aucun virus capable d'infecter Tails. Voir notre avertissement sur le fait de brancher Tails sur un système qui n'est pas de confiance.
Le menu de démarrage liste les périphériques de démarrage possibles. La copie d'écran suivante est un exemple de menu de démarrage :
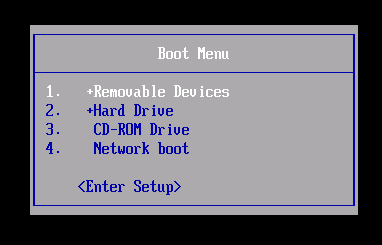
Dans le menu de démarrage, choisir votre clé USB et appuyer sur Entrer.
Si l'ordinateur démarre sur Tails, le chargeur d'amorçage apparaît et Tails démarre automatiquement après 4 secondes.
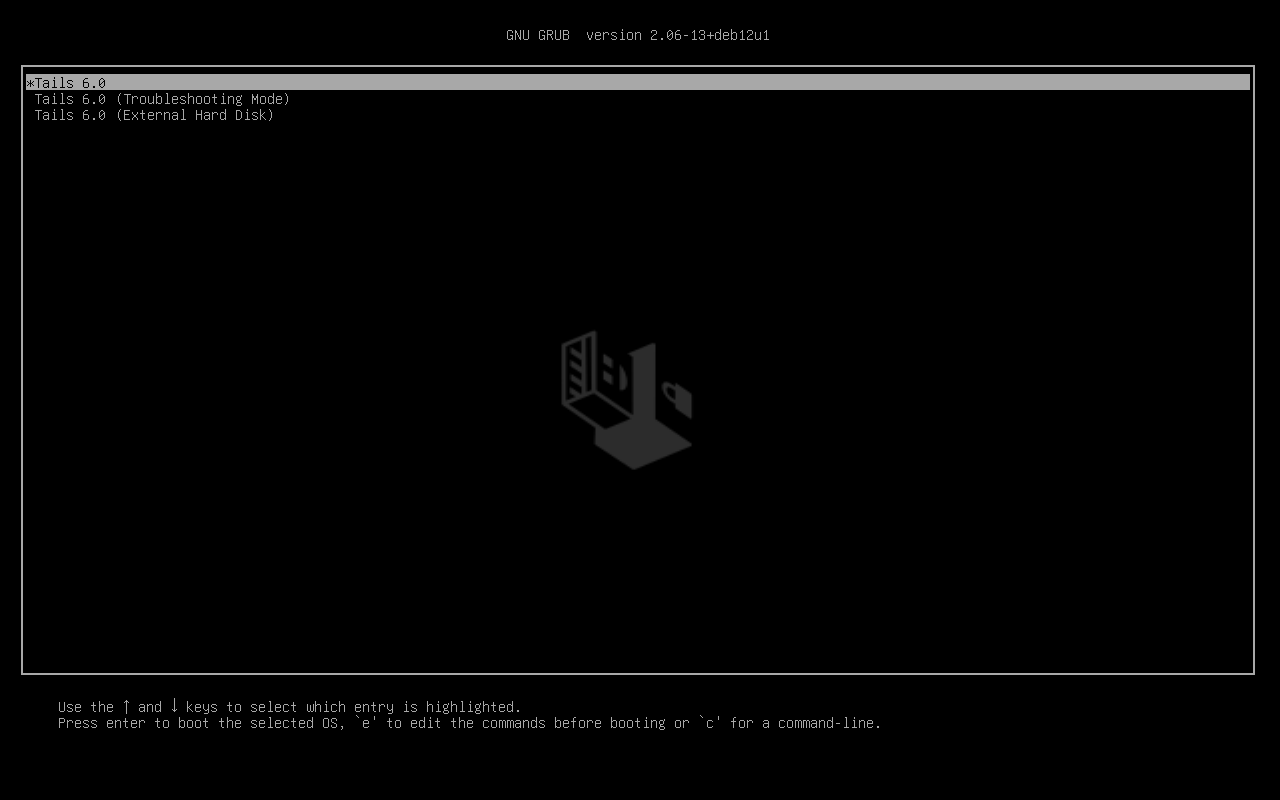
L'entrée Troubleshooting Mode désactive quelques fonctionnalités du noyau Linux et pourrait mieux fonctionner sur certains ordinateurs. Vous pouvez essayer cette option si vous pensez que vous faites face à des erreurs de compatibilité matérielle quand vous démarrez Tails.
L'entrée External Hard Disk permet de démarrer depuis un disque externe et depuis quelques clés USB problématiques.
La plupart des ordinateurs ne démarrent pas automatiquement sur la clé USB Tails, mais vous pouvez appuyer sur la touche du menu de démarrage pour afficher une liste de périphériques possibles à partir desquels démarrer.
Si Windows 8 ou 10 est aussi installé sur l'ordinateur, vous devez plutôt suivre les instructions pour démarrer Tails depuis Windows 8 ou 10. Démarrer Tails depuis Windows est plus facile qu'en passant par la touche du menu de démarrage.
La capture d'écran suivante est un exemple de menu de démarrage :
Cette animation résume comment utiliser la touche du menu de démarrage pour démarrer sur la clé USB :
Les instructions suivantes expliquent en détail comment utiliser la touche du menu de démarrage pour démarrer sur la clé USB :
-
S'assurer d'avoir installé Tails à l'aide de l'une des méthodes suivantes :
-
Éteindre l'ordinateur tout en laissant la clé USB branchée.
Éteindre l'ordinateur et brancher la clé USB Tails.
Éteindre l'ordinateur.
Brancher l'autre clé USB Tails, celle à partir de laquelle vous souhaitez installereffectuer la mise à jour.
Débrancher votre clé USB Tails tout en laissant la clé USB intermédiaire branchée.
-
Identifier les touches possibles du menu de démarrage de l'ordinateur en fonction du fabricant de l'ordinateur dans la liste suivante :
Fabricant Touche Acer F12, F9, F2, Échap Apple Option Asus Échap Clevo F7 Dell F12 Fujitsu F12, Échap HP F9 Huawei F12 Intel F10 Lenovo F12, Novo MSI F11 Samsung Échap, F12, F2 Sony F11, Échap, F10 Toshiba F12 Autres… F12, Échap Sur de nombreux ordinateurs, un message s'affiche très brièvement lors de la mise sous tension, qui explique également comment accéder au menu de démarrage ou modifier les paramètres du BIOS.
-
Allumer l'ordinateur.
Appuyer immédiatement plusieurs fois sur la première touche possible du menu de démarrage identifiée à l'étape 2.
-
Si l'ordinateur démarre sur un autre système d'exploitation ou renvoie un message d'erreur, éteindre à nouveau l'ordinateur et répéter l'étape 3 pour toutes les touches possibles du menu de démarrage identifiées à l'étape 2.
Si un menu de démarrage avec une liste de périphériques apparaît, sélectionner votre clé USB et appuyer sur Entrée.
Si l'ordinateur démarre sur Tails, le chargeur d'amorçage apparaît et Tails démarre automatiquement après 4 secondes.
-
S'assurer d'avoir installé Tails à l'aide de l'une des méthodes suivantes :
-
Éteindre l'ordinateur.
Éteindre l'ordinateur tout en laissant la clé USB branchée.
Branchez l'autre clé USB Tails depuis laquelle vous souhaitez réaliser l'installation.
-
Connecter votre clé USB Tails.
-
Allumer l'ordinateur.
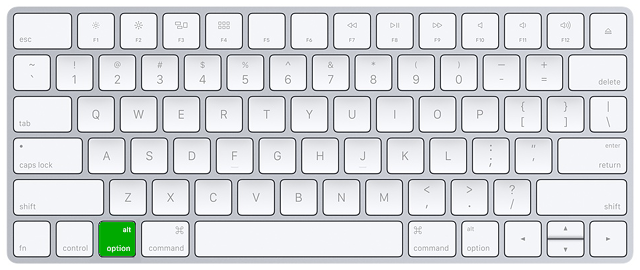
Appuyer et maintenir immédiatement la touche Option (touche ⌥ ou Alt) lorsque le son de démarrage est joué.
Maintenir la touche enfoncée jusqu'à ce que la liste des disques de démarrage possibles apparaisse.
-
Choisir la clé USB et appuyer sur Entrée. La clé USB apparaît comme un disque externe et peut être nommée EFI Boot ou Windows comme dans la capture d'écran suivante :
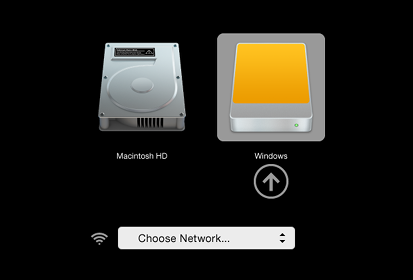
Si la clé USB n'apparaît pas dans la liste des disques de démarrage :
Attendez 2–3 minutes et réessayez. Certaines clés USB ont besoin d'un peu de repos après l'installation.
Essayez tous les autres ports USB de l'ordinateur. Certains ports USB ne peuvent pas être utilisés pour démarrer.
S'assurer d'avoir installé Tails à l'aide de l'une des méthodes suivantes :
S'assurer d'avoir vérifié votre téléchargement de Tails.
S'assurer d'avoir vérifié votre téléchargement.
-
Essayez à nouveau d'installer sur la même clé USB.
Essayez [[à nouveau d'installer|install/mac#install] sur la même clé USB.
Essayez à nouveau d'installer sur la même clé USB.
Essayez à nouveau d'installer sur la même clé USB.
Essayez à nouveau d'installer sur la même clé USB.
Essayez à nouveau d'installer sur la même clé USB.
Essayez à nouveau d'installer sur la même clé USB.
Essayez à nouveau d'installer sur la même clé USB.
Essayez à nouveau d'installer sur la même clé USB.
Essayez à nouveau d'installer sur la même clé USB.
Essayez à nouveau d'installer sur la même clé USB.
Essayez à nouveau d'installer sur la même clé USB.
Essayez d'installer sur une clé USB différente.
Essayez d'utiliser la même clé USB pour démarrer sur un autre ordinateur.
Si votre ordinateur n'affiche toujours pas le chargeur d'amorçage, il se peut qu'il soit actuellement impossible de démarrer Tails sur votre ordinateur.
-
Si votre Mac affiche l'erreur suivante :
Vos réglages de sécurité ne permettent pas de démarrer ce Mac depuis un disque de démarrage externe.
Alors vous devez changer les paramètres de l'utilitaire Sécurité au démarrage de votre Mac pour autoriser le démarrage depuis Tails.
Pour ouvrir l'utilitaire Sécurité au démarrage :
Allumer votre Mac, puis maintenir les touches Commande (⌘) + R enfoncées immédiatement après l’apparition du logo Apple. Votre Mac démarre à partir de la fonctionnalité de récupération de macOS.
Lorsque la fenêtre Utilitaires macOS apparaît, sélectionner Utilitaires ▸ Utilitaire Sécurité au démarrage dans la barre des menus.
Lorsque vous êtes invité à vous authentifier, cliquer sur Saisir le mot de passe macOS, puis choisir un compte d’administration et saisir le mot de passe associé.
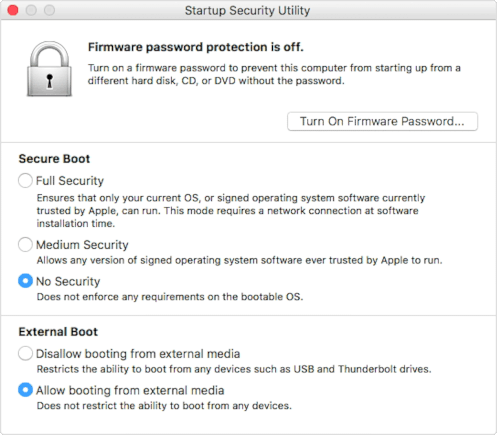
Dans l'utilitaire Sécurité au démarrage :
Choisir Aucune sécurité dans les réglages de démarrage sécurisé.
Choisir Autoriser le démarrage à partir de supports externes dans les réglages de démarrage externe.
Pour que votre Mac soit encore protégé contre le démarrage sur des supports externes non fiables, vous pouvez définir un mot de passe de programme interne, disponible sur macOS Mountain Lion ou une version ultérieure. Un mot de passe de programme interne empêche toute personne tierce ne connaissant pas ce mot de passe de démarrer l’ordinateur à partir d’un autre disque que celui que vous avez défini.
Si vous ne vous souvenez pas du mot de passe de votre programme interne, vous devrez prendre rendez-vous dans un magasin Apple Store ou dans un centre de services agréé Apple.
L'assistance Apple contient plus d'informations à ce sujet :
Si l'ordinateur démarre sur Tails, le chargeur d'amorçage apparaît et Tails démarre automatiquement après 4 secondes.
L'entrée Troubleshooting Mode désactive quelques fonctionnalités du noyau Linux et pourrait mieux fonctionner sur certains ordinateurs. Vous pouvez essayer cette option si vous pensez que vous faites face à des erreurs de compatibilité matérielle quand vous démarrez Tails.
L'entrée External Hard Disk permet de démarrer depuis un disque externe et depuis quelques clés USB problématiques.
Résolution de problème si Tails ne démarre pas
-
Si aucun menu de démarrage n'apparaît, consultez les instructions relatives au démarrage de Tails à l'aide de la touche menu de démarrage.
-
Si aucune des touches du menu de démarrage de la technique précédente ne fonctionnent, consultez les instructions de dépannage : Tails ne démarre pas du tout.
-
Si le menu de démarrage apparaît mais que votre clé USB n'est pas listée dans le menu de démarrage :
Attendez 2–3 minutes et réessayez. Certaines clés USB peuvent avoir besoin de repos après l'installation.
Essayez tous les autres ports USB de l'ordinateur. Certains ports USB ne peuvent pas être utilisés pour démarrer.
-
Si votre clé USB est répertoriée dans le menu de démarrage mais que le chargeur de démarrage n'apparaît pas :
Si votre clé USB apparaît dans la liste des disques de démarrage mais que le chargeur d'amorçage n’apparaît pas :
Attendez 2–3 minutes et réessayez. Certaines clés USB ont besoin d'un peu de repos après l'installation.
Essayez tous les autres ports USB de l'ordinateur. Certains ports USB ne peuvent pas être utilisés pour démarrer.
S'assurer d'avoir installé Tails à l'aide de l'une des méthodes suivantes :
S'assurer d'avoir vérifié votre téléchargement de Tails.
S'assurer d'avoir vérifié votre téléchargement.
-
Essayez à nouveau d'installer sur la même clé USB.
Essayez [[à nouveau d'installer|install/mac#install] sur la même clé USB.
Essayez à nouveau d'installer sur la même clé USB.
Essayez à nouveau d'installer sur la même clé USB.
Essayez à nouveau d'installer sur la même clé USB.
Essayez à nouveau d'installer sur la même clé USB.
Essayez à nouveau d'installer sur la même clé USB.
Essayez à nouveau d'installer sur la même clé USB.
Essayez à nouveau d'installer sur la même clé USB.
Essayez à nouveau d'installer sur la même clé USB.
Essayez à nouveau d'installer sur la même clé USB.
Essayez à nouveau d'installer sur la même clé USB.
Essayez d'installer sur une clé USB différente.
Essayez d'utiliser la même clé USB pour démarrer sur un autre ordinateur.
Si votre ordinateur n'affiche toujours pas le chargeur d'amorçage, il se peut qu'il soit actuellement impossible de démarrer Tails sur votre ordinateur.
-
Si le chargeur d'armorçage apparaît mais échoue à démarrer après cet écran, reportez-vous à la section de dépannage traitant de Tails qui ne démarre pas après le chargeur d'amorçage. la section de dépannage traitant de Tails qui ne démarre pas après le chargeur d'amorçage.
Le démarrage de l'ordinateur à l'aide de la touche du menu de démarrage peut être plus rapide que de d'abord démarrer l'ordinateur sous Windows, puis sous Tails. Nous vous recommandons d'apprendre à démarrer Tails à l'aide de la touche du menu de démarrage si vous utilisez Tails régulièrement.
Apple n'accorde pas une grande importance à la collaboration avec les projets de logiciels libres. Leurs nouveaux matériels sont habituellement très difficiles à faire fonctionner avec Lunix, et donc avec Tails. Les matériels PC ont tendance à être plus ouverts et mieux fonctionner avec Linux.
Bienvenue dans Tails !
Démarrage de Tails
Après le menu de démarrage, un écran de chargement apparaît.

Une ou deux minutes après le chargeur d'amorçage et l'écran de chargement, l'écran de bienvenue apparaît.
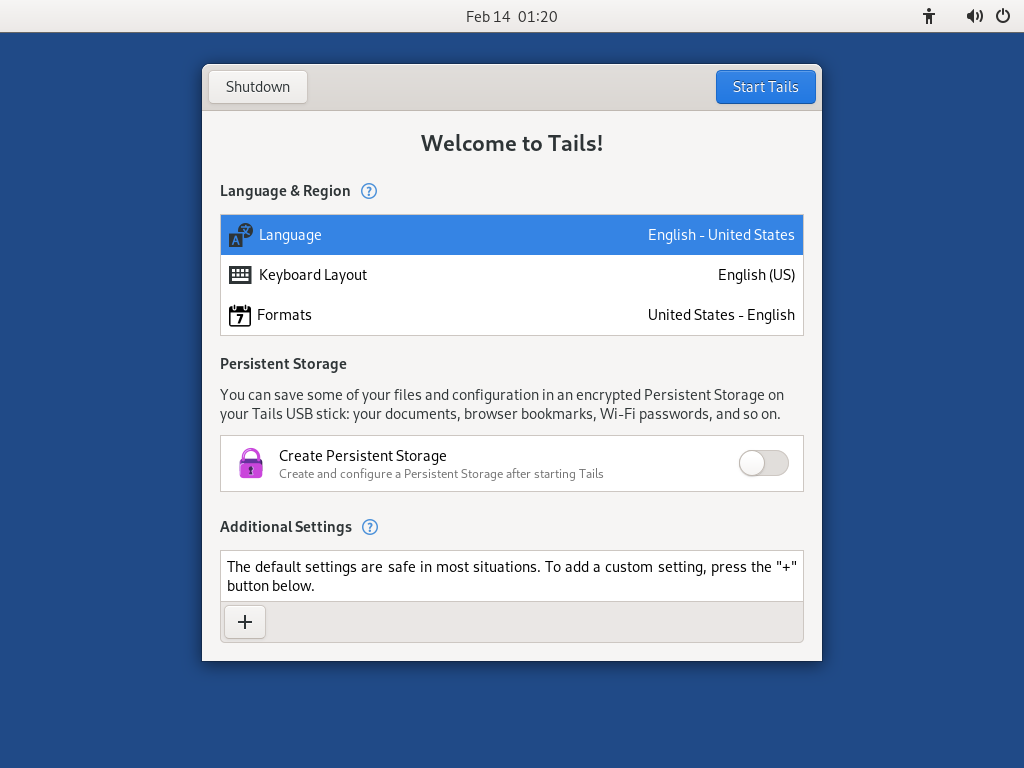
Dans l'écran de bienvenue, sélectionnez votre langue et votre disposition de clavier dans la section Language and Formats. Cliquez sur Démarrer Tails.
Si votre clavier ou pavé tactile ne fonctionne pas, essayez d'utiliser un clavier ou une souris USB :
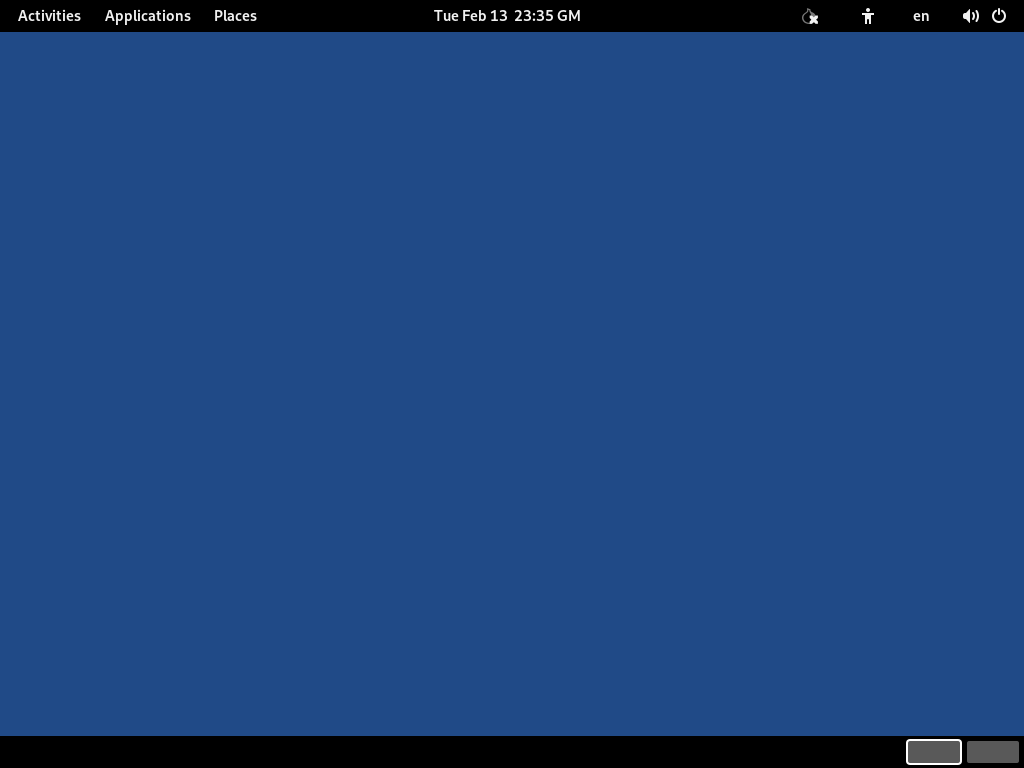
Après 15–30 secondes, le bureau de Tails apparaît.
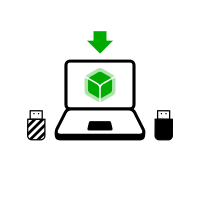
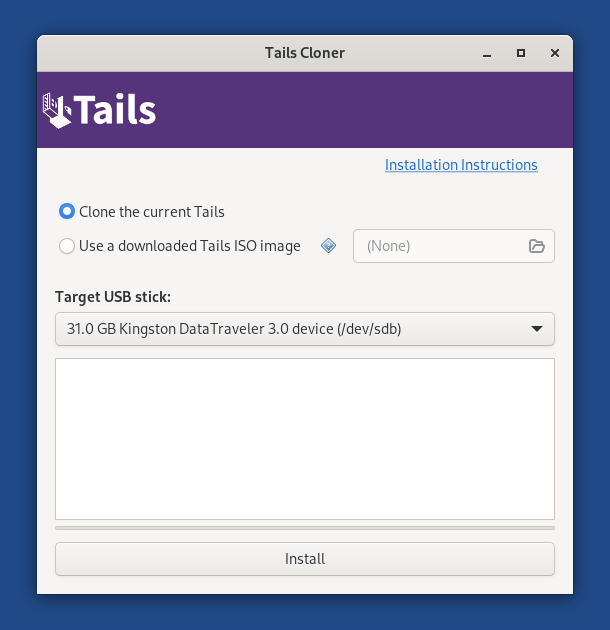
Installer Tails en clonant
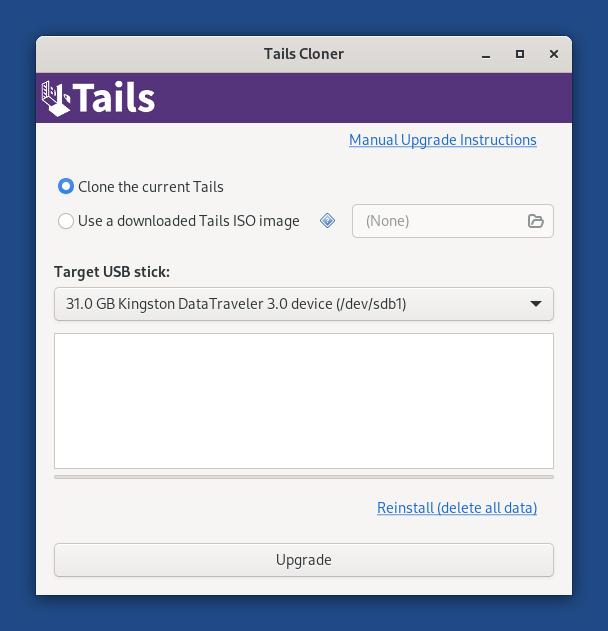
Mettre à jour votre Tails en clonant
À cette étape, vous devrez mettre à jour votre Tails depuis un autre Tails un Tails intermédiaire en utilisant l'Tails Cloner.
Connectez la nouvelle clé USB votre clé USB Tails dans l'ordinateur.
Toutes les données sur cette clé USB seront perdues.
Choisissez pour démarrer Tails Cloner.
If the Tails that you are cloning from has a Persistent Storage, another option Clone the current Persistent Storage is available.

If you select the option Clone the current Persistent Storage, the Persistent Storage of the Tails USB stick that you are cloning from will also be copied.
If you select the option Clone the current Persistent Storage, the Upgrade button becomes unavailable and you can only reinstall and delete all data on the target USB stick.
In the future, we want to allow cloning the Persistent Storage when upgrading as well, for example to make it quicker to update a backup Tails USB stick. (#20362)
Choisissez la nouvelle votre clé USB dans le menu Clé USB cible.
Pour démarrer l'installation, cliquez sur le bouton Installer. la mise à jour, cliquez sur le bouton Mettre à jour.
Lisez le message d’avertissement dans la fenêtre de confirmation.
Cliquez sur Supprimer toutes les données et installer pour confirmer.
L'installation La mise à jour prend quelques minutes.
La barre de progression se fige généralement pendant quelques instants pendant la synchronisation des données sur le disque.
After the installation upgrade finishes, close Tails Cloner
Vous l'avez fait !
Vous avez fini la mise à jour de Tails. Vous pouvez maintenant redémarrer sur votre clé USB Tails.
Merci de prendre soin de vous :)
Lisez les notes de version de Tails 6.5 pour voir les nouveautés.